HISTORY OF PAINT BY NUMBERS
Paint by numbers is an ever-popular hobby among many people and has made its mark in the craft world. Even if you have never made a painting by numbers, you must have heard of it. But what is there to it? The concept is simple, and can be traced back to Leonardo da Vinci teaching it to his students to help them improve their own painting skills. The craft has been popular since the 1950's, when they were first commercially available from the Palmer Paint Company, under their Craft Master brand, and became wildly popular. The concept of the painting kits was presented by Dan Robbins, a commercial artist who recently died at the age of 93.

Now that we have caught up with the history of paint by numbers, let’s get into the technicalities.
What do Paint by Number Kits Look like?
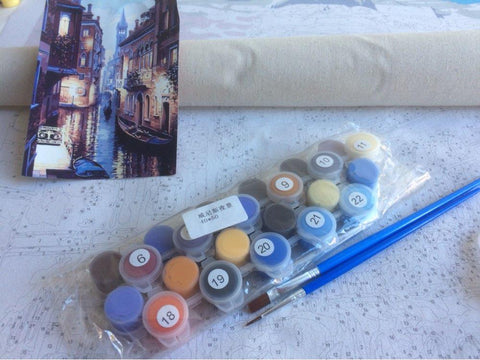
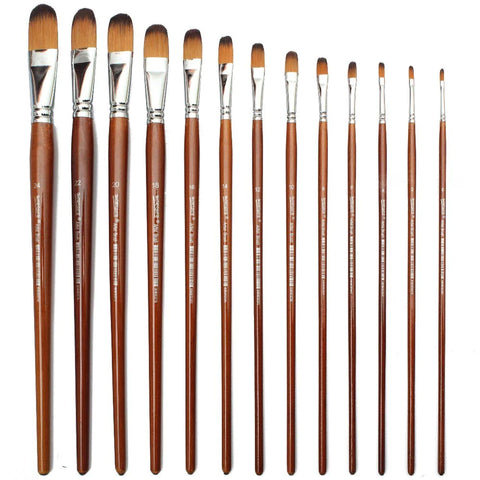
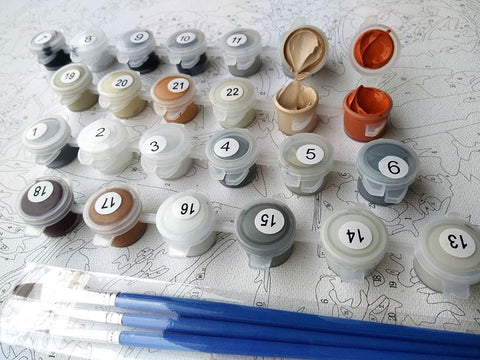
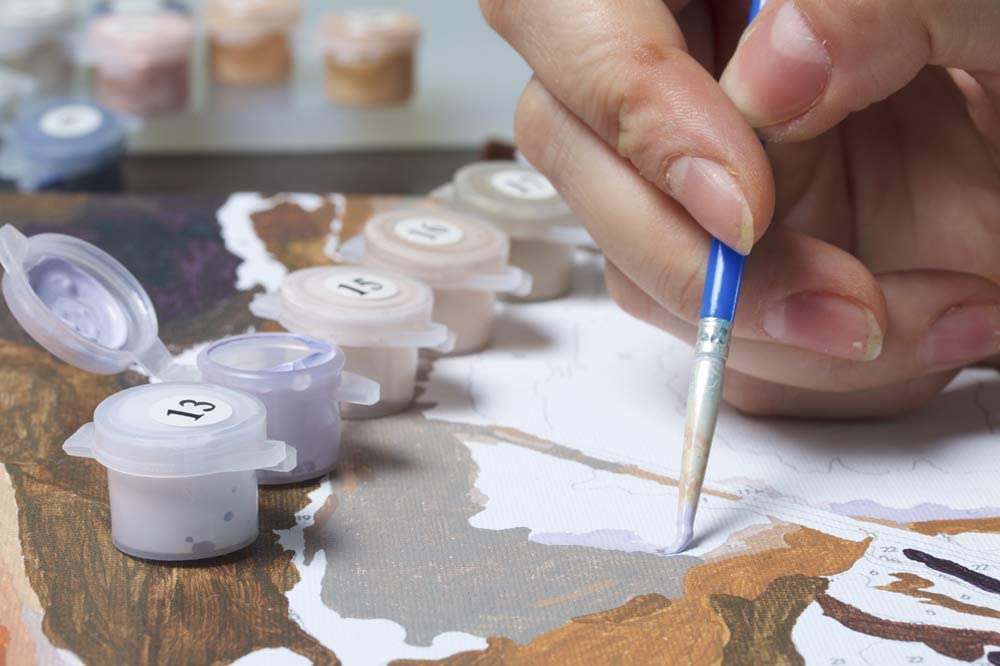
Paint by numbers kits include a printed canvas which guides the painter to use corresponding paints to each number across the painting. The kits come with all the necessary tools and paints required to complete the painting, and only require the skills of the painter and some water to get started on the painting. The paints come in labelled containers, which makes the process of painting easier for the painter. Most kits include a similar inventory of supplies, which include:
- The canvas.
- The paints in their labelled container.
- Paint brushes. (different sizes)
- A picture of the painting as it should look once completed.
Buying a Painting
The first thing to understand when buying a paint by numbers kit is to know the size and color scheme of the painting. Unless you have previous painting experience, it is better to keep the size of the painting on the smaller side, and not get a complicated painting that includes mixing colors. Once you are well-versed, you can choose any painting of your choice, but it is better to stick to an easy-to-do painting in the beginning.
However, our website features over a hundred unique designs in various sizes, and you can choose any painting of your choice from the many categories available.
Choosing The Paints
We strongly suggest that you get started with the paint by numbers with the acrylic colors that you receive in your paint by numbers kit. These colors are beginner-friendly, in addition to being non-toxic and water-soluble. You can easily wash these paints from your hands, brushes, and from any other place, and safely use them around kids and pets. Plus, these paints do not need any sort of mixing, you just need to grab your paint by numbers kit and you are good to go to paint.
Acrylic Paints Vs Oil Paints
The debate between acrylic paint and oil paint is one that has been around for a long time. Both mediums have their own unique benefits and drawbacks, so it can be difficult to decide which one is the best option for you. Acrylic paint is water-based paint while oil paint is oil-based paint. Acrylic paints are generally less expensive than oil paints, and they are also faster drying, making them ideal for beginners. However, oil paints have a longer lifespan and can be used on a wider variety of surfaces than acrylic paints, making them suitable for experienced painters. In general, acrylic paints are better suited for bold, bright colors while oil paints are better for creating realistic textures.
Other options of paints for painting by numbers
You can use lots of other paints for your artwork, but their results will lack certain characteristics and will not look much of good, rather the results may be messy, dull, blurred, overflown paints, etc. Thus you should use paints that are compatible with paint by numbers.
Tempera
Tempera paints are one of the oldest forms of paint. They are made from pigment, water, and an agent to bind the paint together. The most common agent is egg yolk. Tempera paints can be applied to a variety of surfaces including paper, canvas, wood, and even metal. They are relatively easy to use and quickly dry.
Some people believe that tempera is the best medium for painting by numbers because the paint dries quickly and doesn't smudge. However, others prefer other types of paint because they feel that tempera can be a bit stiff and difficult to work with. Ultimately, it is up to the individual artist to decide what type of paint they prefer.
Water paints
Water paint is a type of paint that uses water as the main ingredient. This type of paint is often used for decorative purposes, such as painting walls or ceilings. It is also sometimes used for crafts and other projects.
Some people prefer water-based paint and believe it is best for a paint-by-numbers project. This type of paint will not dry out as quickly as an acrylic paint would, but it can be easily diluted with water if needed. Some people say that water paints provide a more realistic painting experience, while others find that they can be more difficult to work with.
Our Recommendation
Well, there are lots of options of paints that you can choose to use for your paint by numbers. But we recommend that you start with acrylic colors and once you make your expertise in acrylic paints, then you should move forward with other paints like tempera and oil painting.
Choosing The Brushes
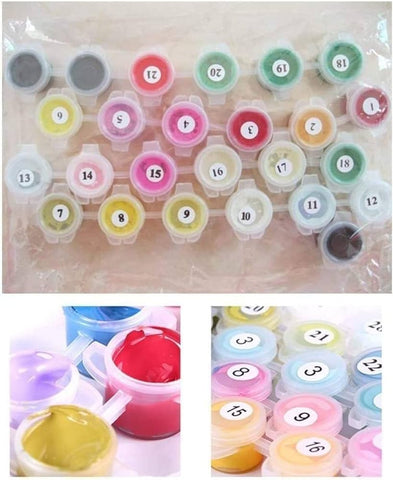
When you get a paint by numbers kit typically you are provided with a good set of paintbrushes. Especially, the brushes in our kits are good enough to set off such a journey of numeral painting, that you are going to cherish. Unless and until you are an expert artist who has some experience in painting you should continue with the brushes that you receive with your kit.
Types of Paint Brushes
There are different types of paint brushes that a person can choose according to his preference.
- Synthetic brushes
Synthetic brushes are made from the material of nylon, polyester, or both.
- Natural hair
Natural hair brushes are made from the hair of animals like hogs.
The Difference
There are a few key differences between synthetic and natural hair paintbrushes that you should be aware of. Synthetic brushes are made with man-made bristles, while natural hair brushes are made with actual animal hairs. Synthetic brushes are typically less expensive than natural hair brushes, but they also tend to be less durable and absorb less paint. Natural hair brushes, on the other hand, are more expensive but tend to be more durable and better at holding paint. When choosing between synthetic and natural hair paint brushes, it ultimately comes down to personal preference
Our recommendation
Synthetic brushes are best for acrylic paints, whereas natural hair brushes are best for oil paints. We recommend that you use synthetic brushes when you are painting by numbers with acrylic colors and when you switch to oil paints for your numeral painting then you should go for natural hair brushes.
A STEP-BY-STEP GUIDE TO PAINTING BY NUMBERS
Painting by numbers requires very little previous experience from the painter. All you have to do is get your painting kit out and bust your painting moves. We will go through a step-by-step process of completing a paint-by-numbers kit.
-
PREPARE THE WORK SURFACE
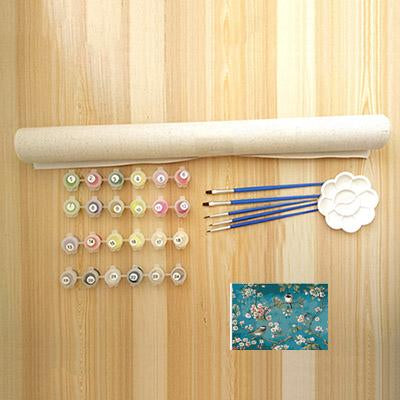
The first thing to do before you start your painting is to arrange all your painting supplies in an orderly manner. Get a couple of water containers to clean brushes in and a scrap cloth or a paper towel to keep brushes on between uses.
-
STUDY THE CANVAS
Once you have all your supplies in front of you, take a look at the painting. It is better to decide which colors you will paint in first and which brushes can used for which colors to increase efficiency and make sure that you don’t have to clean your brushes again and again.
-
PAINT YOUR FIRST COLOR, THEN RINSE AND REPEAT UNTIL DONE
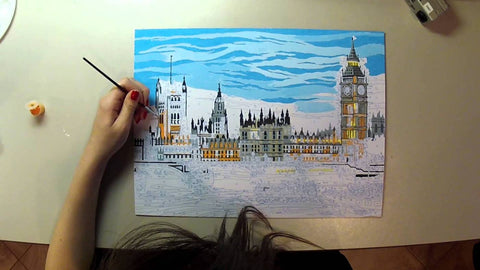
Start with the color you have decided to go with first and complete painting all its corresponding spaces until you are done. Wash the brush and continue with the second. Repeat the process until your painting is completed.
-
PUT THE FINISHING TOUCHES ONTO YOUR PAINTING
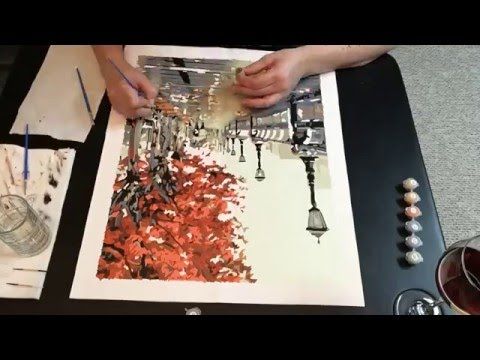
Now that you have completed a first coat of paint, you can go back and touch up on areas where the canvas shows through. You can also clean up the edges of the painting for a better finish.
-
DRY THE PAINTING
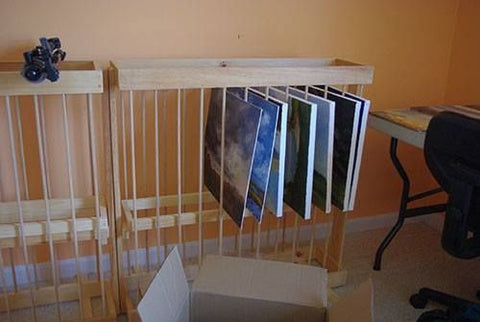
Now that your painting is finished, it is time to dry it properly. While the surface of the painting may feel dry after a few hours, it is better to keep the painting out to dry for a week or so to ensure that it is dry under the surface too.
-
VARNISH, FRAME, AND HANG YOUR PAINTING
Once your painting is completely dry, dress it up as you like and frame it. You can also hang it on the walls in your room or keep the painting as a memory. All that matters is that you created a beautiful painting all by yourself.
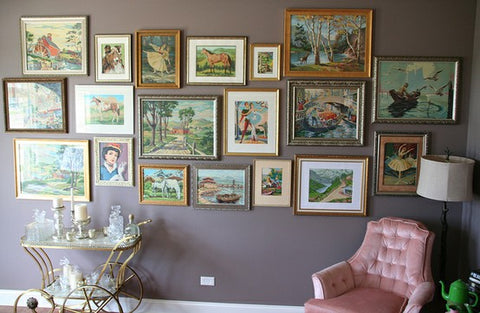
With our vast experience with Paint by numbers we have compiled a set of tips for paint by number artists.
Framing your Paint by Numbers
So you have completed your artwork and now you are looking for framing it. You have come to the right spot, in this blog you are going to find an easy and helpful way to frame your “paint by numbers”. Painting by numbers can be incredibly beautiful, but they're nothing without the right frame. The frame sets the tone for the painting and helps to show off its features. Framing instantly enhances the beauty and grace of your artwork and takes your masterpiece to the next level. Plus, it's a great way to showcase your project to people around you in addition to protecting your significant art from damage of any sort. Framing your artwork will make it last for years to come.
Framing greatly influences a painting, it can either increase or decrease the level of a painting that's why we suggest choosing the right choice of frame for your artwork.
Framing your painting by numbers using stretcher bars
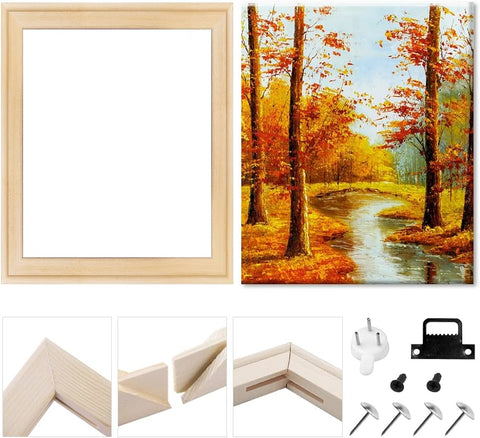
You can use stretcher bars to frame your painting by numbers. Most painters use stretcher bars to frame their paintings. This is because they offer a lot of support and help to keep the painting in shape. They are also very easy to use and can be put together quickly.
There are a few things that you will need to consider when using stretcher bars to frame your painting. The first thing is the size of the painting. You will need to make sure that the stretcher bars are the right size so that they can fit the painting. The second thing to consider is the type of wood that you want to use for the stretcher bars. Some painters prefer to use a certain type of wood, while others just use whatever is available.
Stretcher Bar
A Stretcher Bar is a thin, wooden, or metallic bar that is used to stretch and mount a canvas. The canvas is attached to the stretcher bars with staples, tacks, or glue. The bar helps to keep the canvas pulled and in place before it is painted. This is important because it ensures that the finished product will be even and without any wrinkles or distortions.
Using stretcher bars before or after painting
Stretcher bars are an important part of the painting. They help keep the canvas stretched and in shape while you are painting. You can use stretcher bars before or after you have painted your canvas. If you use them before, it will be easier to paint on a flat surface. If you use them after, the canvas will be more stable and less likely to warp.
Before Vs After
There are two schools of thought when it comes to using stretcher bars before or after painting. Some artists believe that it is better to stretch the canvas before painting, as this will help to prevent the paint from seeping underneath the canvas and ruining the finished product. Others believe that it is better to stretch the canvas after painting, as this will ensure that there is no movement in the canvas during the painting process and prevents distortions. Both before and after have pros and cons, ultimately it's up to you to decide what works best for you.
You can choose to use stretcher bars before painting or you can choose the other way around, finishing your artwork first and then using stretcher bars to frame it.
The Process of Stretching
To frame your painting with stretcher bars, you will need
- Stretcher bars
- Your Painting
- A measuring tape
- Scissors
- Staple gun and staples
- Rubber Hammer
- Glue
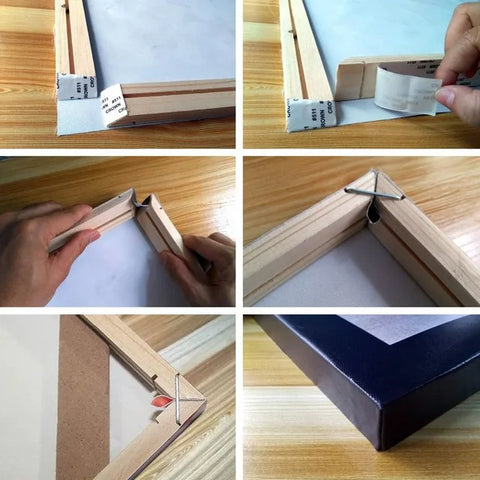
Join the Stretcher bars
Grab the stretcher bars and lay them on a flat surface, check the mitered ends around the corners of the stretcher bars. Assemble the stretcher bars by joining the mitered ends with each other and forming a frame in the shape of a rectangle. If the stretcher bars have not joined properly, gently apply rubber hammers to the corners.
Staple the Corners
With the stretcher bars in place, you can now staple the four corners of the stretcher bars together. Make sure to use a heavy-duty staple gun for this step, as it will need to be able to withstand the tension of the canvas. Be careful not to staple the canvas too tightly, as this can cause it to rip.
Place the stretcher bars
Now that the stretcher bar frame is ready, place the stretcher bar frame on top of the canvas. Make sure that the frame is even with the edges of the canvas so that it is level. Make sure to pull tight so that there are no wrinkles in the fabric.
Measurements and trimming
Thoroughly check if the size of the frame is perfectly matching with the canvas. In case there is the issue of size, then don't panic, instead, use the measuring tape to measure the size conflict between the frame and the canvas and carefully trim the stretcher, accordingly.
Staple Canvas to the frame
After you have corrected the measurement of the frame in correspondence with the canvas, you will want to staple it to the stretcher bars. Fold your canvas on one side around the stretcher bar and start stapling carefully with the staple gun. Make sure that the staples are evenly spaced and that there are no wrinkles in the canvas. You may also want to use a hammer to make sure that the staples are securely in place.
You can also use a brush to apply a thin layer of glue to the canvas to help keep it in place.
Recheck
After stapling the canvas on all the sides, you should check thoroughly whether or not your canvas is placed properly on the frame, if there are any mistakes then you should remove the staples and apply them again, properly.
Working on the edges of the canvas
When you have done the previous steps correctly, now it's time for the last step. Grab the corner of your canvas and stretch it, now twist it to the 45° angle around the stretcher bar. Next, you need to fold the other area of the canvas to arrange the folded edge with the corner of the frame. Now staple the canvas thoroughly on all sides to stretch the canvas properly.
Happy framing
And that's all it takes to frame your paint by numbers by using stretcher bars, now hang your significant artwork and showcase it to anyone, and use it as décor for your bedroom, or living room. You have successfully framed your painting by numbers, now it's going to be protected from damage and last longer.

8 comments
I haven’t left with any questions to confuse me. Thank you for this guide
As a beginner i was really confused. But this guide really help me. Appreciated
A complete guide for the beginners.
I would have never thought that there was this much history behind the paints. I really thought they were just another simple, new idea which has come about and people are going crazy over. I had never really heard of them until a couple of years ago. Thank you to Dan Robbins for making such a fun creation.
I have become mildly addicted to the paints, something which I never thought would have happened before. I just can’t help but order more and more online once I’ve finished them!
The article talked about a nice workspace for you to do the paintings in. My workspace overlooks a nice long road outside my window. I love to sit at my table while reading the paper and enjoying the view ahead of me. In recent times I have come to admire my surroundings more and more. I love sitting down and doing one of my paintings while sitting at my workstation and looking out. I have been trying to find sceneic paintings to keep the theme of visual aesthetics.
I will frame some of these and hang them in my study room to admire whenever I am here.